GPU instances
Overview
Civo offers NVIDIA GPU compute instances for AI/ML training and inference, rendering, and scientific workloads. There are two ways to get a GPU-ready instance: start from a base Ubuntu image and install the NVIDIA drivers yourself, or use a Civo-provided CUDA disk image that ships with the NVIDIA drivers, the NVIDIA container toolkit, and CUDA already configured and ready to use on first boot.
If you want to run GPU workloads on Kubernetes instead of a single instance, see GPU Clusters on Civo Kubernetes.
Regional availability
GPU compute is not available in every Civo region. Check the Regions page for the current availability matrix, or list the regions your account can reach from the CLI:
civo region list
Pass --region <CODE> to any civo CLI command to target a specific region, or set your default region with civo region use <CODE>.
Choosing a disk image
When you launch a GPU instance you can pick the disk image that best matches how much customisation you need.
| Path | When to use |
|---|---|
Base Ubuntu image (e.g. ubuntu-noble) + install drivers yourself | You need a specific driver or CUDA version, or you're hardening / customising the OS. Follow Installing NVIDIA drivers on GPU instances running Ubuntu. |
Civo CUDA image (e.g. ubuntu-cuda13-1) | You want NVIDIA drivers, the container toolkit, and CUDA pre-installed and ready to use on first boot. |
Listing the available CUDA disk images
Civo publishes a family of CUDA-enabled Ubuntu disk images. You can list them from the CLI or pick one in the Dashboard.
- Dashboard
- Civo CLI
- Terraform
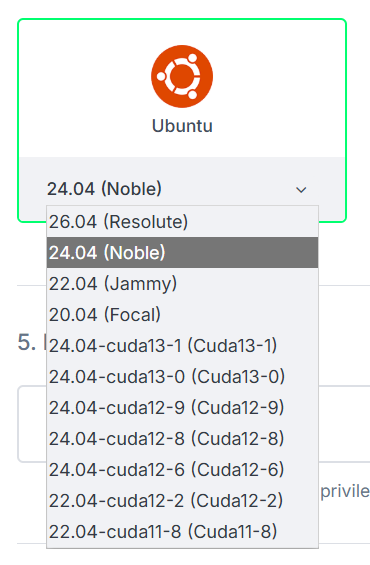
When creating an instance, choose Ubuntu in the disk image picker and pick a CUDA variant from the version drop-down. CUDA images are listed as 24.04-cudaXX-Y (CudaXX-Y) alongside the standard Ubuntu releases.
List every disk image available in your current region with civo diskimage list:
civo diskimage list
The output is a table of all available images. CUDA-enabled Ubuntu images are named ubuntu-cudaXX-Y and sit alongside the standard Ubuntu images:
+--------------------------------------+-----------------+----------------+-----------+--------------+
| ID                                   | Name            | Version        | State     | Distribution |
+--------------------------------------+-----------------+----------------+-----------+--------------+
| <uuid>                               | ubuntu-noble    | 24.04          | available | ubuntu       |
+--------------------------------------+-----------------+----------------+-----------+--------------+
| <uuid>                               | ubuntu-cuda12-8 | 24.04-cuda12-8 | available | ubuntu       |
+--------------------------------------+-----------------+----------------+-----------+--------------+
| <uuid>                               | ubuntu-cuda13-0 | 24.04-cuda13-0 | available | ubuntu       |
+--------------------------------------+-----------------+----------------+-----------+--------------+
| <uuid>                               | ubuntu-cuda13-1 | 24.04-cuda13-1 | available | ubuntu       |
+--------------------------------------+-----------------+----------------+-----------+--------------+
To narrow the list to just CUDA images, pipe through grep:
civo diskimage list | grep cuda
The newest images (currently ubuntu-cuda13-0 and ubuntu-cuda13-1) ship the latest CUDA release on Ubuntu 24.04 — pick the highest version unless you have a reason to pin to an older CUDA.
You can look up CUDA images from Terraform using the civo_disk_image data source, filtered by name:
data "civo_disk_image" "cuda" {
  region = "LON1"
  filter {
    key    = "name"
    values = ["ubuntu-cuda13-1"]
  }
}
Reference the resolved image as element(data.civo_disk_image.cuda.diskimages, 0).id when creating an instance — see the Terraform tab in the next section for the full example.
Creating a GPU instance with a Civo CUDA image
Once you've chosen a CUDA image and a GPU size, create the instance using whichever interface suits you. For the full list of GPU sizes and pricing see Creating an instance and civo.com/pricing.
- Dashboard
- Civo CLI
- Terraform
Follow the standard Creating an instance flow, with two GPU-specific choices:
- On Step 3 — Choose Size, switch to the GPU category and pick a GPU size (for example
g4.gpu.small). - On Step 4 — Choose Image, select Ubuntu and pick a CUDA version from the drop-down (for example
24.04-cuda13-1 (Cuda13-1)).
Complete the rest of the form (network, firewall, SSH key) as normal and click Create.
civo instance create my-gpu-instance \
  --size g4.gpu.small \
  --diskimage ubuntu-cuda13-1 \
  --region lon1
The example below queries a GPU size and a CUDA disk image, then creates an instance using both. Substitute your own region, SSH key resource, hostname, and the GPU size / CUDA version you want.
# Query a GPU instance size
data "civo_size" "gpu" {
  filter {
    key    = "name"
    values = ["g4.gpu.small"]
  }
  filter {
    key    = "type"
    values = ["instance"]
  }
}

# Query a CUDA disk image
data "civo_disk_image" "cuda" {
  region = "LON1"
  filter {
    key    = "name"
    values = ["ubuntu-cuda13-1"]
  }
}

# Create the GPU instance
resource "civo_instance" "gpu" {
  region     = "LON1"
  hostname   = "my-gpu-instance"
  size       = element(data.civo_size.gpu.sizes, 0).name
  disk_image = element(data.civo_disk_image.cuda.diskimages, 0).id
}
Apply the configuration with terraform init followed by terraform apply. For full Civo provider setup see Using Civo with Terraform.
Once the instance is ACTIVE, SSH in and run nvidia-smi to confirm the GPU is visible.
Single-GPU NVLink behaviour
Single-GPU H100 hosts need a one-line NVIDIA module option to come up cleanly. The Civo CUDA image handles this for you; if you bring your own drivers on a base image you need to apply it yourself.
What happens by default
When the NVIDIA driver loads on an H100 host with only one GPU, it tries to bring up the NVLink fabric. Because there is no peer GPU on the host the fabric initialisation fails, and as a result the driver never becomes ready. The symptom customers see is nvidia-smi hanging or erroring out, and the kernel log shows NVLink initialisation failures.
The fix is to tell the nvidia kernel module not to bring up NVLink in the first place by setting NVreg_NvLinkDisable=1 in /etc/modprobe.d/.
What the Civo CUDA image does
The Civo CUDA images ship with a systemd unit called nvidia-service-check.service that runs early at boot, before the NVIDIA fabric-manager service starts. It uses lspci to detect whether an NVLink Switch device is present on the host:
lspci | grep -i nvidia | grep -q "Switch"
-
If no switch is present (a single-GPU host), the service writes the following module option to
/etc/modprobe.d/nvidia-disable-nvlink.conf:options nvidia NVreg_NvLinkDisable=1and then reloads the
nvidiakernel module so the option takes effect before any other NVIDIA service tries to use NVLink. -
If a switch is present (a multi-GPU host with NVLink), the same file is written with the option commented out, leaving NVLink enabled, and
nvidia-fabricmanagercomes up normally.
The net effect is that, on the Civo CUDA image, nvidia-smi "just works" on both single-GPU and multi-GPU instances without any manual steps.
Reboot / reload requirement when you change it manually
The NVreg_NvLinkDisable=1 option is only read when the nvidia kernel module is loaded. On a fresh boot of the Civo CUDA image this is handled automatically by nvidia-service-check.service running before the driver and fabric-manager services start.
If you ever change /etc/modprobe.d/nvidia-disable-nvlink.conf yourself, you need to either:
- reboot the instance, or
- unload and reload the
nvidiakernel modules (and restart any NVIDIA services such asnvidia-persistencedandnvidia-fabricmanager)
for the change to apply. The simplest reliable option is a reboot.
If you're using a base image instead
If you're not using a Civo CUDA image and you're on a single-GPU H100 host, you must apply the same modprobe option yourself, or the driver will not come up. The procedure is covered as part of the manual driver install — see Single-GPU H100 instances: disable NVLink.
Verifying the GPU is ready
After the instance is up, run the following checks over SSH:
nvidia-smishould list the expected number of GPU(s) with the driver and CUDA versions populated.- On a single-GPU H100 host — whether you're using the Civo CUDA image or the manual workaround —
cat /proc/driver/nvidia/params | grep NvLinkDisableshould show thatNvLinkDisableis set.
See also
- Installing NVIDIA drivers on GPU instances running Ubuntu — manual driver install on a base image.
- GPU Clusters on Civo Kubernetes — GPUs on Kubernetes including the K8s NVLink workaround.
- Regions — regional availability matrix.