
Kubeflow is the Machine Learning Toolkit for Kubernetes. It is an open source project to make Machine Learning on Kubernetes EASY.
From the Kubeflow documentation and Civo's Kubeflow documentation:
The Kubeflow project is dedicated to making deployments of machine learning (ML) workflows on Kubernetes simple, portable and scalable.
Our goal is not to recreate other services, but to provide a straightforward way to deploy best-of-breed open-source systems for ML to diverse infrastructures. Anywhere you are running Kubernetes, you should be able to run Kubeflow.
For a quick introduction to Kubeflow you can watch this video:
This guide is a 5 step process from zero to Notebook server via Kubeflow on Kubernetes
Step 1: Create a Kubernetes cluster
We'll use Civo Kubernetes, which is based on K3s, to experiment with this quickly. If you don’t yet have an account, sign up here. You could also use any other Kubernetes cluster you have access to.
Create a new cluster from the UI (you can also use Civo CLI)
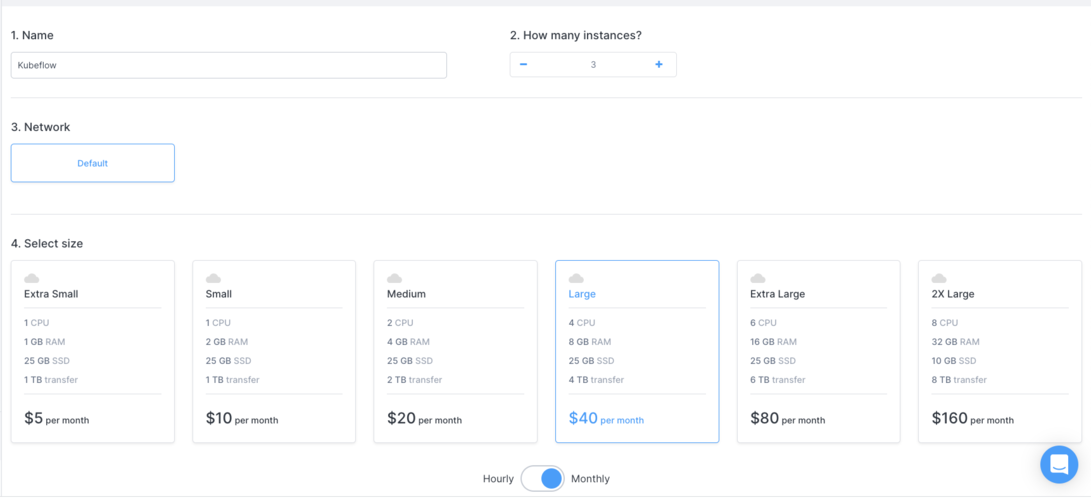
Once ready you should see the cluster with ready nodes.

Make sure you have kubectl installed, and the kubeconfig file for your cluster downloaded so that you can run kubectl get nodes and get details of the cluster you just created:
kubectl get nodes
NAME                                STATUS   ROLES                  AGE   VERSION
k3s-kubeflow-dd2f9cb4-node-ca00     Ready    <none>                 55m   v1.20.2+k3s1
k3s-kubeflow-dd2f9cb4-master-b0e1   Ready    control-plane,master   84m   v1.20.2+k3s1
k3s-kubeflow-dd2f9cb4-node-bd75     Ready    <none>                 83m   v1.20.2+k3s1
Step 2: Install Kustomize
Kustomize is a Kubernetes-native configuration management tool. It introduces a template-free way to customize application configuration and traverses a Kubernetes manifest to add, remove or update configuration options without forking. It is available both as a standalone binary and as a native feature of kubectl.
Go to the Installation page and follow the steps for your operating system. For this case I am installing on a Mac so it's a simple command using homebrew:
$ brew install kustomize

$ kustomize --help

Manages declarative configuration of Kubernetes.
See https://sigs.k8s.io/kustomize

Usage:
  kustomize [command]

Available Commands:
  build                     Build a kustomization target from a directory or URL.
  cfg                       Commands for reading and writing configuration.
  completion                Generate shell completion script
  create                    Create a new kustomization in the current directory
  edit                      Edits a kustomization file
  fn                        Commands for running functions against configuration.
  help                      Help about any command
  version                   Prints the kustomize version

Flags:
  -h, --help          help for kustomize
      --stack-trace   print a stack-trace on error

Additional help topics:
  kustomize docs-fn                   [Alpha] Documentation for developing and invoking Configuration Functions.
  kustomize docs-fn-spec              [Alpha] Documentation for Configuration Functions Specification.
  kustomize docs-io-annotations       [Alpha] Documentation for annotations used by io.
  kustomize docs-merge                [Alpha] Documentation for merging Resources (2-way merge).
  kustomize docs-merge3               [Alpha] Documentation for merging Resources (3-way merge).
  kustomize tutorials-command-basics  [Alpha] Tutorials for using basic config commands.
  kustomize tutorials-function-basics [Alpha] Tutorials for using functions.

Use "kustomize [command] --help" for more information about a command.
Step 3: Clone the Kubeflow repository and deploy Kubeflow to the cluster
git clone https://github.com/kubeflow/manifests.git
Once the repository has been downloaded to its directory, navigate to it and the example/ directory found inside.
$ cd example
$ ls
kustomization.yaml
Here you can see the kustomization.yaml file, which you can do the Kustomize build on and apply it to your cluster:
kustomize build | kubectl apply -f -
It will deploy a lot of Kubernetes objects as it is doing a complete Kubeflow installation, and you will be able to see a bunch of namespaces and workloads created.
You may notice that kubectl apply commands may fail on the first try. Do not worry: this is inherent in how Kubernetes and kubectl work (e.g., a Custom Resource (CR) must be created after a Custom Resource Definition (CRD) becomes ready). The solution is to simply re-run the command until it succeeds.
For convenience, you can have your terminal retry the process until it succeeds with this bash script you can run in a bash terminal:
while ! kustomize build example | kubectl apply -f -; do echo "Retrying to apply resources"; sleep 10; done
After the completion you will see the namespace and resources created for Kubeflow 1.3.
$ kubectl get ns
NAME               STATUS   AGE
default            Active   69m
kube-system        Active   69m
kube-public        Active   69m
kube-node-lease    Active   69m
auth               Active   13m
cert-manager       Active   13m
istio-system       Active   13m
knative-eventing   Active   13m
knative-serving    Active   13m
kubeflow           Active   13m
Step 4: Enable HTTPS to access Kubeflow
As you can see above that Istio is deployed as part of Kubeflow deployment and the Kubeflow interface can be accessed via Istio's Ingress-Gateway.
In order to connect to Kubeflow using NodePort / LoadBalancer / Ingress, you need to setup HTTPS. As the official documentation for Kubeflow 1.3 mentions, the reason is that many of the included web applications such as Tensorboard Web App, the Jupyter Web App and Katib UI use Secure Cookies, so accessing Kubeflow with HTTP over a non-localhost domain does not work.
If you do not set up HTTPS, you might end up with this error Could not find CSRF cookie XSRF-TOKEN in the request
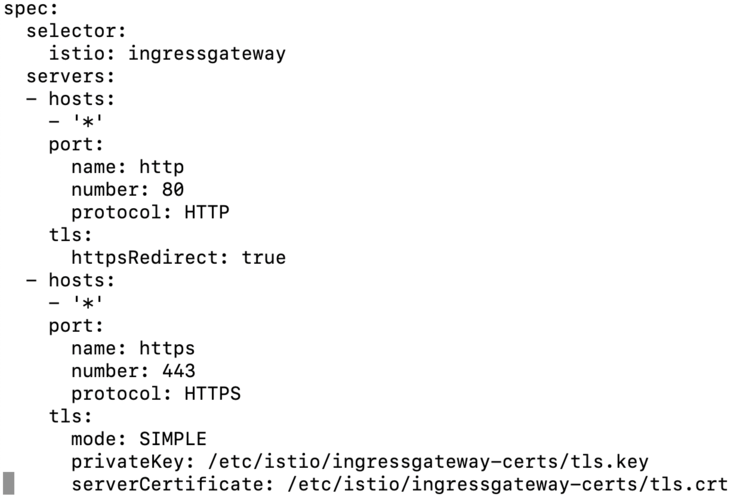
To set up HTTPS, edit the Gateway object to add port 443 and make port 80 to redirect to 443 by running:
kubectl edit -n kubeflow gateways.networking.istio.io kubeflow-gateway
After editing, the definition should look like below:
You can also create a certificate with cert-manager if you are familiar with it:
apiVersion: cert-manager.io/v1alpha2
kind: Certificate
metadata:
  name: istio-ingressgateway-certs
  namespace: istio-system
spec:
  commonName: istio-ingressgateway.istio-system.svc
  # Use ipAddresses if your LoadBalancer issues an IP
  ipAddresses:
  - <LoadBalancer IP>
  # Use dnsNames if your LoadBalancer issues a hostname (eg DNS name from Civo dashboard)
  dnsNames:
  - <LoadBalancer HostName>
  isCA: true
  issuerRef:
    kind: ClusterIssuer
    name: kubeflow-self-signing-issuer
  secretName: istio-ingressgateway-certs
Replace the dnsNames with the one mentioned in Civo Dashboard for your cluster:

Once you create this you can access the Kubeflow UI by accessing the cluster's DNS_NAME:PORT or MasterIP:PORT.
You can find the port from the ingress gateway by running the following:
$ kubectl get svc -n istio-system  istio-ingressgateway
NAME                   TYPE       CLUSTER-IP     EXTERNAL-IP   PORT(S)                                                                      AGE
istio-ingressgateway   NodePort   10.43.113.55   <none>        15021:30987/TCP,80:31330/TCP,443:30032/TCP,31400:31340/TCP,15443:32006/TCP   3d23h
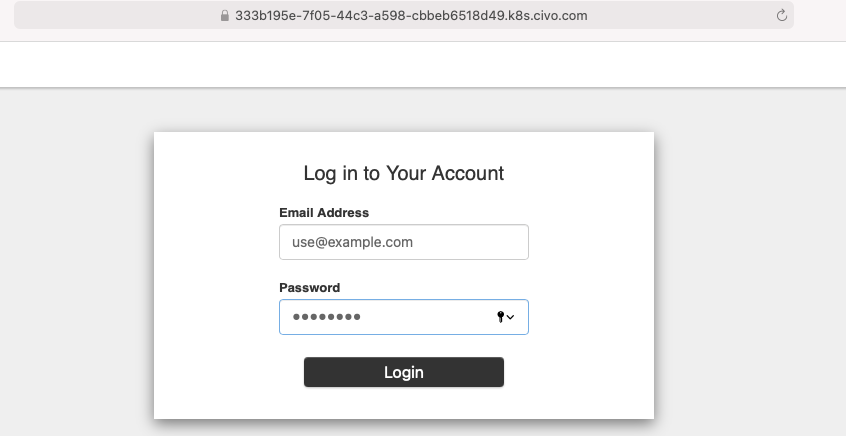
To log in to Kubeflow, the default credentials are:
Default Username : use@example.com
Default Password : 12341234
Step 5: Create a Jupyter Notebook and Start with your ML workloads
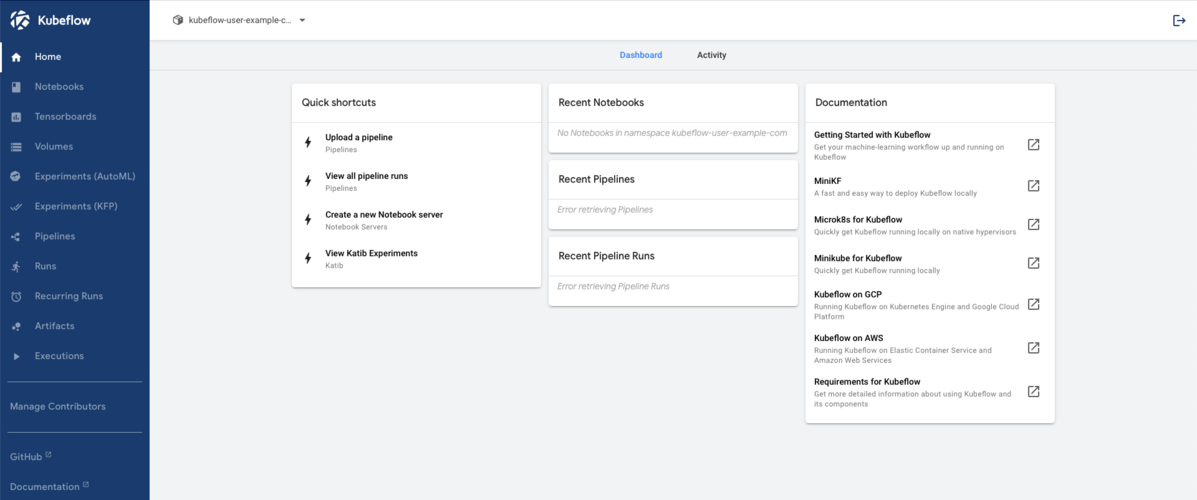
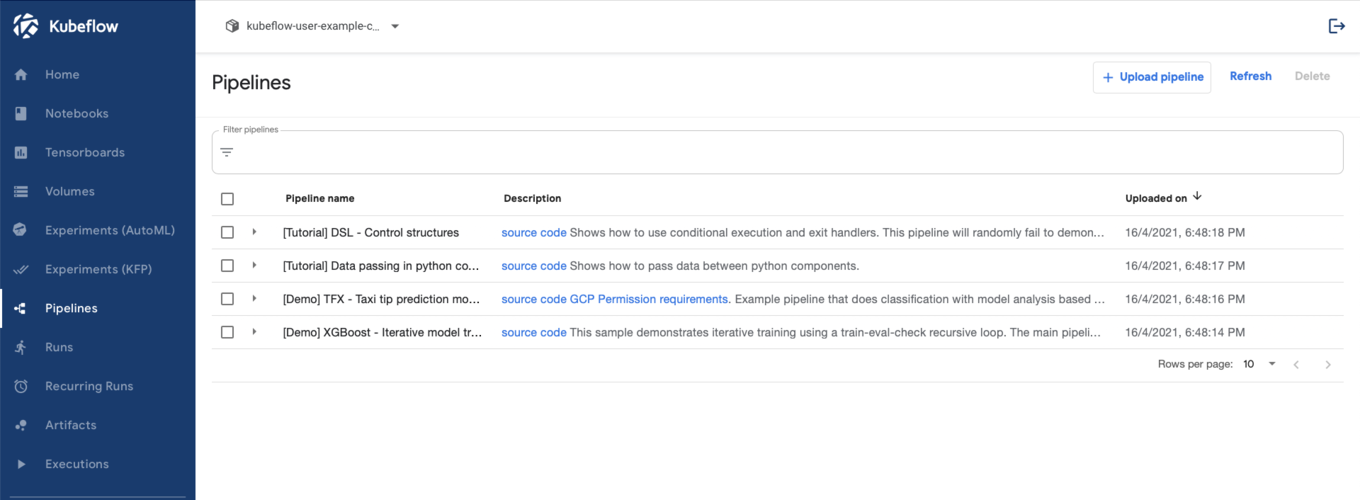
Now that you can access the Kubeflow UI, you will be amazed to see the things that you can do with it. For an initial example, let's create a Jupyter notebook and access it.
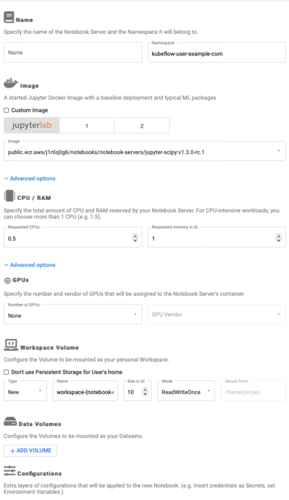
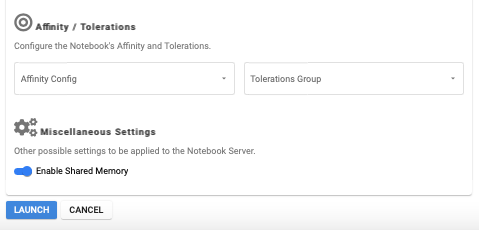
Go to Notebooks and add new server:

You can create Jupyter, codeserver, rstudio notebook servers with various image options. You can also choose your custom image. You can select the CPU/GPU, PV size and other setting. Let's go with the default values and create a Jupyter server.

The notebook server is created that we can connect to a complete Jupyter Lab in your browser:

It's time to kickstart your machine learning journey on Kubernetes!
Note on storage
- By default Kubeflow uses PersistentVolumes/PersistentVolumeClaims (PV/PVC) for data persistence. Civo Kubernetes is powered by K3s, which comes with local-path dynamic PV creation storage by default.
You can see when you install/create a notebook, a PV and PVC get created automatically:
$ kubectl get pv
NAME                                       CAPACITY   ACCESS MODES   RECLAIM POLICY   STATUS   CLAIM                                      STORAGECLASS   REASON   AGE
pvc-2a97f0fd-b30a-4862-b577-44cea5632055   10Gi       RWO            Delete           Bound    kubeflow/katib-mysql                       local-path              3d23h
pvc-d04ce1a7-eb5b-4da3-81e4-bb5a222fbbcc   20Gi       RWO            Delete           Bound    kubeflow/minio-pvc                         local-path              3d23h
pvc-4eb317ea-e2d9-4c6e-b296-ccf70913ec31   20Gi       RWO            Delete           Bound    kubeflow/mysql-pv-claim                    local-path              3d23h
pvc-db650934-5fb1-440e-a031-a9bd6a124338   10Gi       RWO            Delete           Bound    istio-system/authservice-pvc               local-path              3d23h
pvc-85d07563-6740-40d9-998a-af215e138fe9   10Gi       RWO            Delete           Bound    kubeflow-user-example-com/workspace-demo   local-path              3d22h
You can use other storage solutions as well if you wish, but for testing purposes the local-path provisioner is sufficient. If you wish to use Kubeflow in a more production-oriented situation, you may wish to explore another storage option such as Longhorn.
Note on Kubeflow 1.3
Kubeflow 1.3 is coming with a lot of new features packed. Here is a blog explaining why this release is so great with all the UI and the feature updates.
Earlier there were few components that shipped with Kubeflow:

But now with the new updates it has undergone major changes and you get many more features out of the box:
Wrapping Up
This is how you can deploy the latest Kubeflow version on Kubernetes, create a notebook server, pipelines, and start working with your machine learning workloads.
Let us know on Twitter @Civocloud and @SaiyamPathak if you try Kubeflow out on Civo Kubernetes! If you wish to explore the code for Kubeflow, the GitHub repository can be found at https://github.com/kubeflow/kubeflow


