
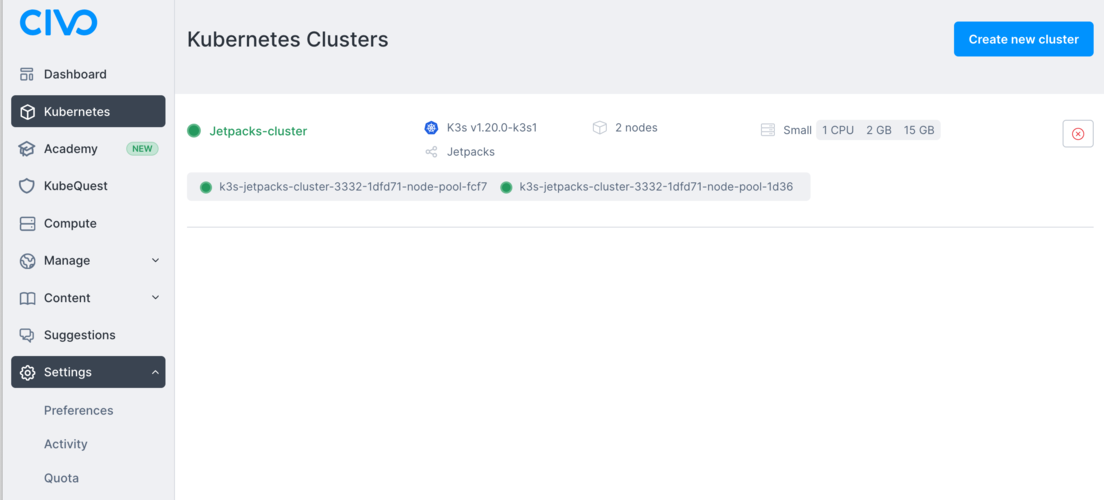
This guide will get you up to speed using the Teams functionality on Civo. We will begin with an overview of terminology, and then demonstrate the various changes Teams introduces, along with how you can control access to features and privileges on an organisational level. This will allow you to get to grips with various scenarios even up to the level of managing a multi-account system like demonstrated in this organisation chart:

In the above chart, the multiple teams that govern multiple users' access privileges, under multiple accounts, all under the Acme Jetpacks, Inc umbrella, is composed of the elements we are going to discuss next.
Terminology
Account
On Civo, Accounts are the level at which billing, quota settings, cluster and instance ownership, and the like are grouped. Accounts own resources (such as Kubernetes clusters). Through granting permissions to teams, access to these resources can be granted by an account owner. Each Account will have one or more teams within them.
Team
Teams are a grouping of users, each member of a team having one or more permissions, or roles. When a user logs in, they don't have to select which team to use - only which account they want to act within. The permissions available are the total set of permissions they have across the teams in that account, combined.
User
Users are created under Accounts. User privileges, as determined by the Account owner, restrict the ability of people within a team to their required roles. For example, let's take a hypothetical company called Acme Jetpacks, Inc. There may not be any need for any Acme Jetpacks-Development team user to view billing information, only the cloud resources relevant to them. Or, in terms of resource creation privileges, you may wish certain Users within an account to not be able to create, delete or otherwise operate on cloud resources, only to view and download their configuration so that these users can gain access to the clusters or instances in the account.
A user can belong to one more teams. An example: This means that Andy, the CTO of Acme Jetpacks, can be a team member in both the Acme Jetpacks-Development and Acme Jetpacks-production accounts through belonging to a team called "owners" in each account.
Conversely Eva, an engineer at Acme Jetpacks, may only have access to resources relevant to her day job by her belonging to a team called "Site Reliability". While Andy can do all operations including adding and removing privileges for users through their team memberships, Eva may have view-only privileges, and only to resources that have been designated.
Organization
Organizations are a kind of umbrella grouping of accounts. They do not own any resources themselves, or grant permissions – instead, Organizations on Civo allow you to group accounts in the left-hand side bar, as well as allowing you to create a Role encompassing a set of permissions that you can apply to any account without having to re-defined them in each case.
Process
Let's take a look at a few scenarios that illustrate the power of the new Teams options. These scenarios move up in terms of complexity and scope.
Scenario 1: Granting a colleague access to a Civo account to manage Kubernetes clusters
In this scenario, you are the CTO of Acme Jetpacks, Inc, an exciting new startup. As part of your growth, you have added another team member, who needs to have access to your account and everything that Acme Jetpacks are running on Civo.
You would begin with navigating to the Teams menu on your Civo dashboard:
You should see a team called Owners, with your account listed as a member, and an option to manage the team:
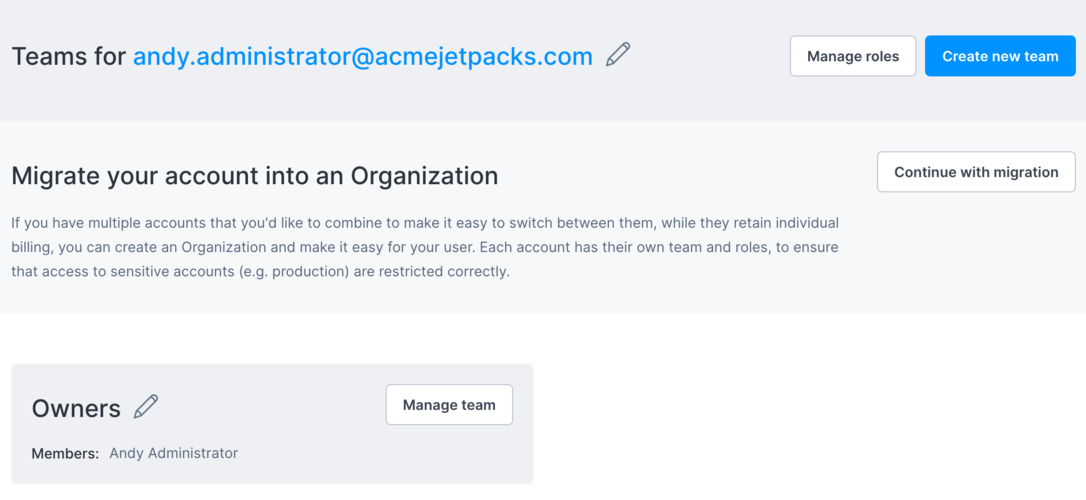
When you go to manage the team members, you'll see your own membership, and an option to add team members:

Through the "Add team members" button in the top right of the screen, we can add people into our team. Crucially, these new members do not yet have to be active Civo users. The system checks whether an email account has been registered at Civo, and will invite anyone who is not yet a user:
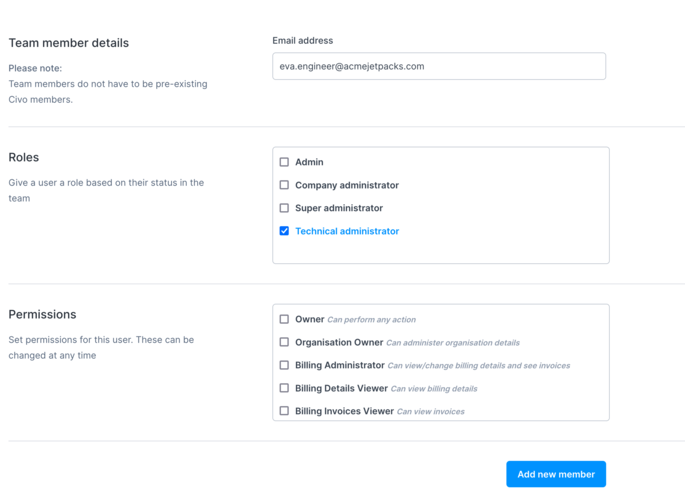
You would need to check the appropriate permissions for the account you are inviting to join your team. In this case, I will check the "Technical Administrator" box which will grant the invitee access to manage Kubernetes clusters and other cloud resources, but no visibility to billing details.
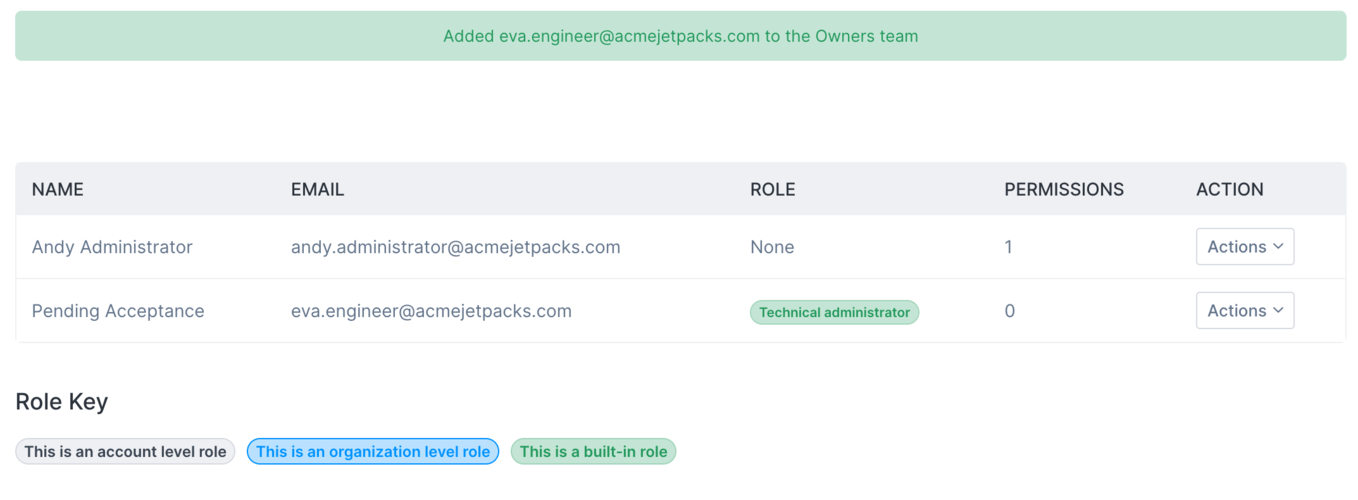
The resulting view shows that I've invited someone, and the invite is "pending acceptance" until they complete the joining process through the email the person receives.
As there isn't yet a Civo account with the email I specified, the recipient is prompted to sign up. This will have sent the email address you specified an email with details on how to sign up and join the team. A user will have to follow the link provided and use the invitation code generated in order to successfully join:

Once they do, they'll have the option to set up their own password and user details for Civo:

In this case, I invited a user called Eva Engineer to join the team of owners of Acme Jetpacks. When Eva logs in, she will be able to see the running cluster (and start her own if need be) but won't have to worry about account administration or billing. In this image, you can see that Eva has access to the Jetpacks-cluster and other cloud resource screens, but the Settings menu does not have the Billing section; that's not part of the team permissions granted to her.
Scenario 2: Grouping team members into a Development Team
In this scenario, Acme Jetpacks Incorporated is growing fast, and we are adding more team members. Instead of having everyone in the "owners" team and having to give permissions for each person, we'll create a new team in our account. It will be called Site Reliability, and include Eva Engineer from above, and all of our new joining engineers who need access to our cloud resources. These team members won't have to configure their own payment methods, just join the team when prompted.
Logging in as our administrator/owner account, let's navigate to our teams management page:

We will create a new team called "Site Reliability" by entering it as a name in the Create new team section. Next, we'll start with adding Eva's account into that team as a Technical Administrator. This kind of role gives administrative access to all cloud resources (Kubernetes, Instances, firewalls, etc) that an engineering team may require:

Having a dedicated team for various roles gives you flexibility to add people into them, or remove them as required.
If you needed more granularity than the pre-defined Roles that we just assigned, there is a way for you to give individual permissions to users, or create entirely new roles. Let's explore that next.
Scenario 3: Creating a new role to give view-only access to specified cloud resources
Say you have a new starter joining the team at Acme Jetpacks. You may want them to be a part of the Site Reliability team, but perhaps not have full administrative access to your Kubernetes clusters. This new starter, Nigel Newbie, should still be able to view the configuration of the Kubernetes clusters you are running to get familiar with them, but you don't want them to worry about any instances you have running. What we would need is a custom set of permissions for this one user. This can be achieved through the "create a new role" option of the Manage Roles screen:

You will be able to name the type of role you are creating, and select the permissions desired.

Bear in mind that you will need to select all required privileges for the role you are creating - these are not automatically cascaded downwards. Above is an example Developer role that includes view permissions to Kubernetes resources, but no privileges to create, update or change them, and no privileges to manage team roles themselves or other aspects of an account.
This type of role management can be used when the pre-defined roles don't suit your particular need.
Scenario 4: Multiple accounts for separate cost centres: Organizations
As mentioned above, each Account on Civo has its own resource quota, billing, networking and ownership of cloud resources. If required, Accounts can be grouped together under an umbrella called an Organization.
Under an Organization, you may have separate but related accounts. Using our Acme Jetpacks example, you may have an account for Acme Jetpacks Development/Staging, an account for Acme Jetpacks Production, and Acme Jetpacks R&D. This way all billing arising from usage of resources within each of these accounts will be grouped within that account, and you can have separate teams in each account.
Creating an Organization
In order to start an Organization, you would need to migrate an existing account into the Organization structure, which will give you the option to then have other accounts join the organization provided they have the correct information. You can access this migration process through the main Teams administration page. Once you do, you will see the following screen:
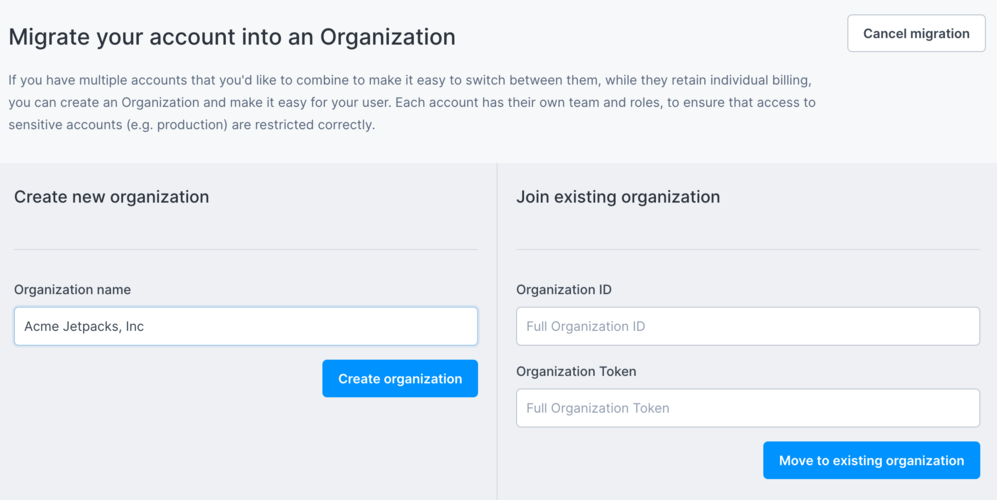
The two options for migrating your account into an Organisation are to create a new Organisation, or to join an existing one. The second option to join an existing organisation will be relevant to you if are already a Civo user, and an organisation owner has sent you an Organisation ID as well as a joining token. If you are creating a new organisation, such as we will create below, give your Organization a name, such as "Acme Jetpacks, Inc".
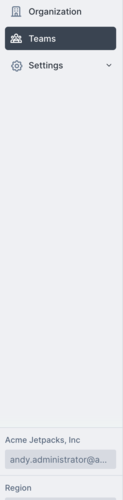
When your Organisation is created you will notice two changes. First, the Organisation will be updated to show as the current context in the sidebar, rather than saying "Current account" and second, you will now have an Organization menu option along with Teams:
Organizations in practice
A reason for having multiple accounts within an organisation structure is that you can separate user privileges across them. In other words, you can have Nigel Newbie, the junior developer at Acme Jetpacks, can be given full access to clusters, firewalls and the like in the Development account, without having privileges to do the same thing on the Production account. Nigel can belong to different teams across these accounts, or only within some of them. Like the old saying goes, "it's on a need to know basis... and you don't need to know!"
Another advantage of an organization structure is that if you have complex defined roles, you can use these across the organisation's various accounts. You would need to define define these roles in the Organization menu's "Edit Roles" screen to have them be available throughout all Acccounts that comprise your Organization.
Creating a new Account for an Organization
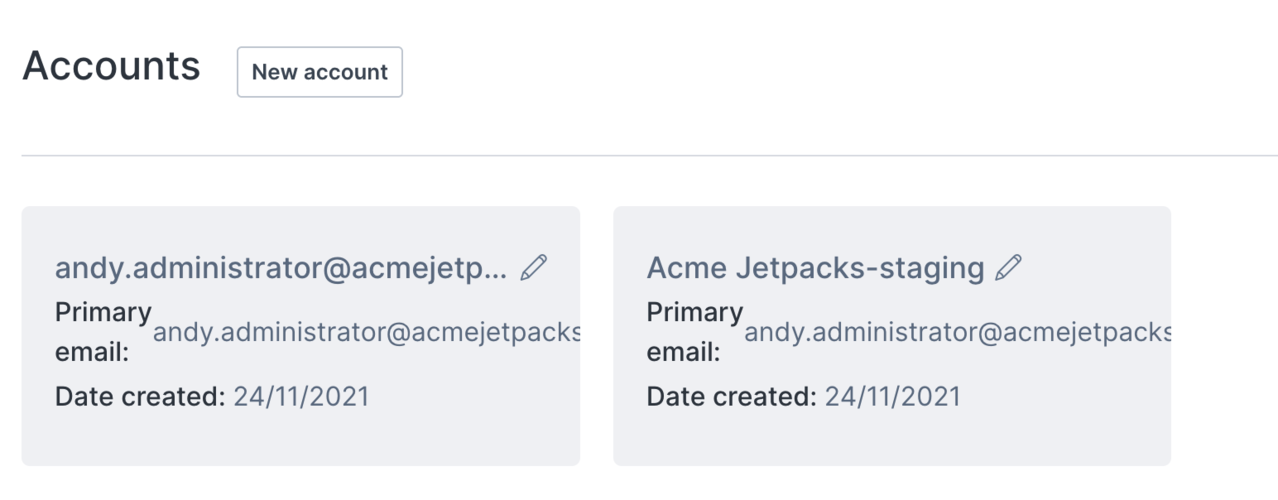
In the Organization menu, you have the option to create a new account to separate billing and functions. Let's create an Acme Jetpacks-staging account as an example.
In the Organization screen, find the "New account" button:
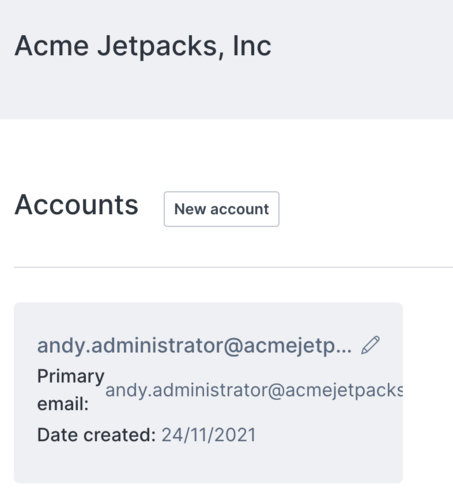
You will be prompted to enter an Account name. We'll call ours Acme Jetpacks-staging as mentioned above.
The account creation process takes a few minutes, so you may have to refresh the screen to get your new account to display:
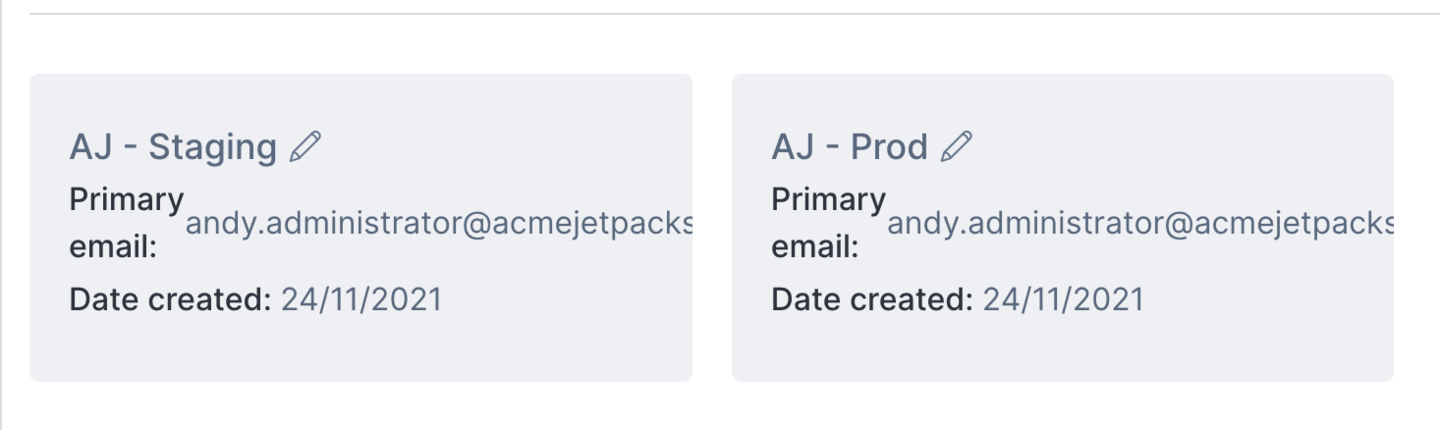
It may be helpful to rename our old Account to reflect its nature as the Production account, by using the pencil icon next to its name:
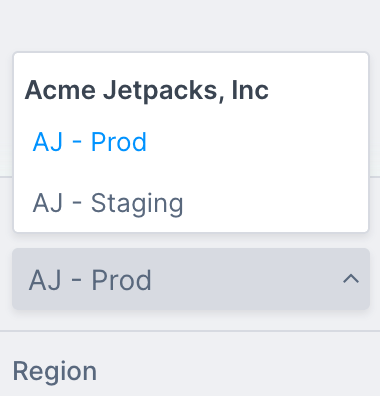
Once you have done this, any user with permissions to the Account will be able to switch to managing it, and the cloud resources within, by selecting it from the sidebar drop-down:
This way, you can create accounts for all the needs of your organisation: Production and Staging are the two most obvious points of difference, but wherever you need separation of billing and resources having separate accounts can be useful.
Joining an Account to an existing Organization
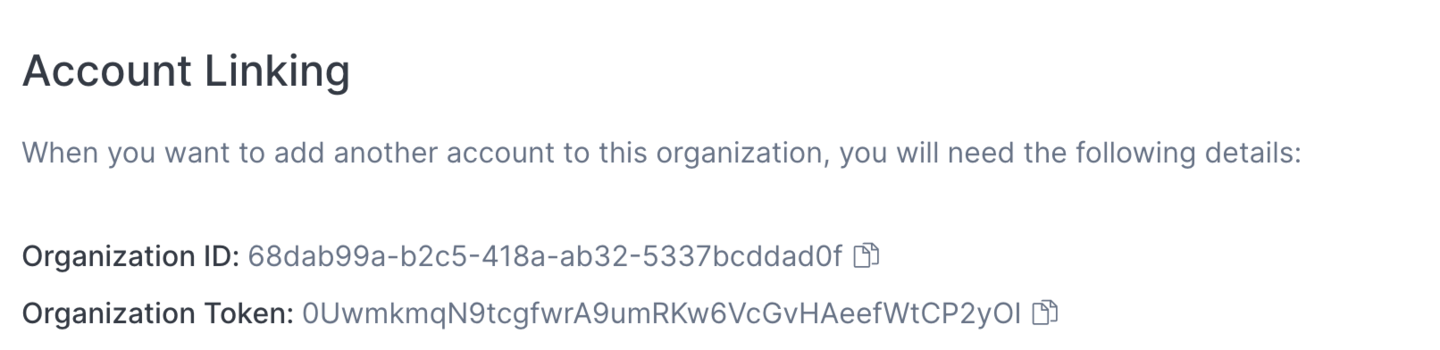
If your account is already an Organization owner, you will be able to navigate to the Organization menu in the left-hand sidebar and view the required information for another account to join the Organization:
If an account owner uses the ID and token to join your organisation, you would then need to grant the appropriate roles and permissions for the user(s) who are meant to have access to both Accounts. In other words, adding accounts to an organisation only groups those accounts for users that have team membership in both the account being added, and the original account.
Wrapping up
The above guide shows the relationship between an Organization at the top level, Accounts grouping teams below it, and the Users who have privileges to perform actions based on their team memberships.
Through combining the above examples, the same system can extend to more complex relationships, such as shown in the organisation chart at the top of this post.
